# Basic Pi-hole Setup on Raspberry Pi 5
Why did I decide to build this?
As someone who has always enjoyed ethical hacking, I was seeing myself in a situation where I wanted to build something exciting, but at the same time something that could teach me some of the basics of how DNS works as well as some other topics in network security. That’s why I decided to conduct this project.
WARNING: This project assumes that you have already built a functional Raspberry Pi 5 and have not flashed any type of OS into it yet.
Setup
Hardware
For this project we are going to need the following:
- Functional Raspberry Pi 5 (8gb)
- 32gb SD Card
Software
In regards to software, we only need a couple of programs and protocols.
- Pi-hole
- SSH
- Raspberry Pi Imager
- Windows Terminal
Procedure
-
Download and install Raspberry Pi OS using the Raspberry Pi Imager to flash Raspberry Pi OS (Lite is fine) onto your SD card.
-
Once flashed, make sure to click on configuration and enable SSH. Also, do not forget to set up a username and password you can remember.

-
Connect your Raspberry Pi 5 to power and your network (Ethernet is recommended for reliability, but Wi-Fi works too). FYI: if you are going to use Wi-Fi for this step, make sure to refer to the official Raspberry Pi manual on how to configure a Wi-Fi connection before flashing it onto your SD card.
-
Power on your Raspberry Pi. Wait for it to boot up.
-
Find your Raspberry Pi’s IP address. If your Pi is connected via Ethernet, you can often find the IP in your router’s admin page under “connected devices,” or use a tool like
arp -aon your computer.Another way of doing this is by doing
ping raspberrypi.localon your computer’s terminal as shown here. If the device is live and working, it will return the IP address -
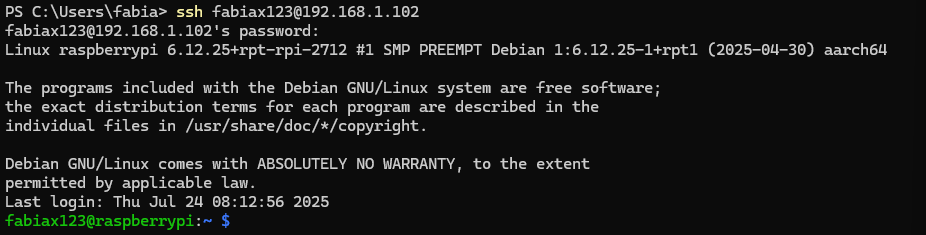
Now we will be finally connecting to the Raspberry Pi via SSH. Make sure the device is on and running and do this on your Windows terminal
ssh pi@<raspberry-pi-ip-address>. Make sure to replace<raspberry-pi-ip-address>with the address you found above (e.g., 192.168.1.50). Thepiat the beginning before the @ is the username you chose when flashing the OS.
You should see something like this
-
If you see the screen above, then great! We are almost done configuring this baby. Now, we are going to actually install pi-hole by doing this in the command terminal
curl -sSL https://install.pi-hole.net | bash. This will launch an interactive setup.-
Select your network interface (usually eth0 for Ethernet)
-
Pick an upstream DNS provider (e.g., Cloudflare, Google)
-
Confirm or set a static IP if prompted
-
Choose default blocklists.
-
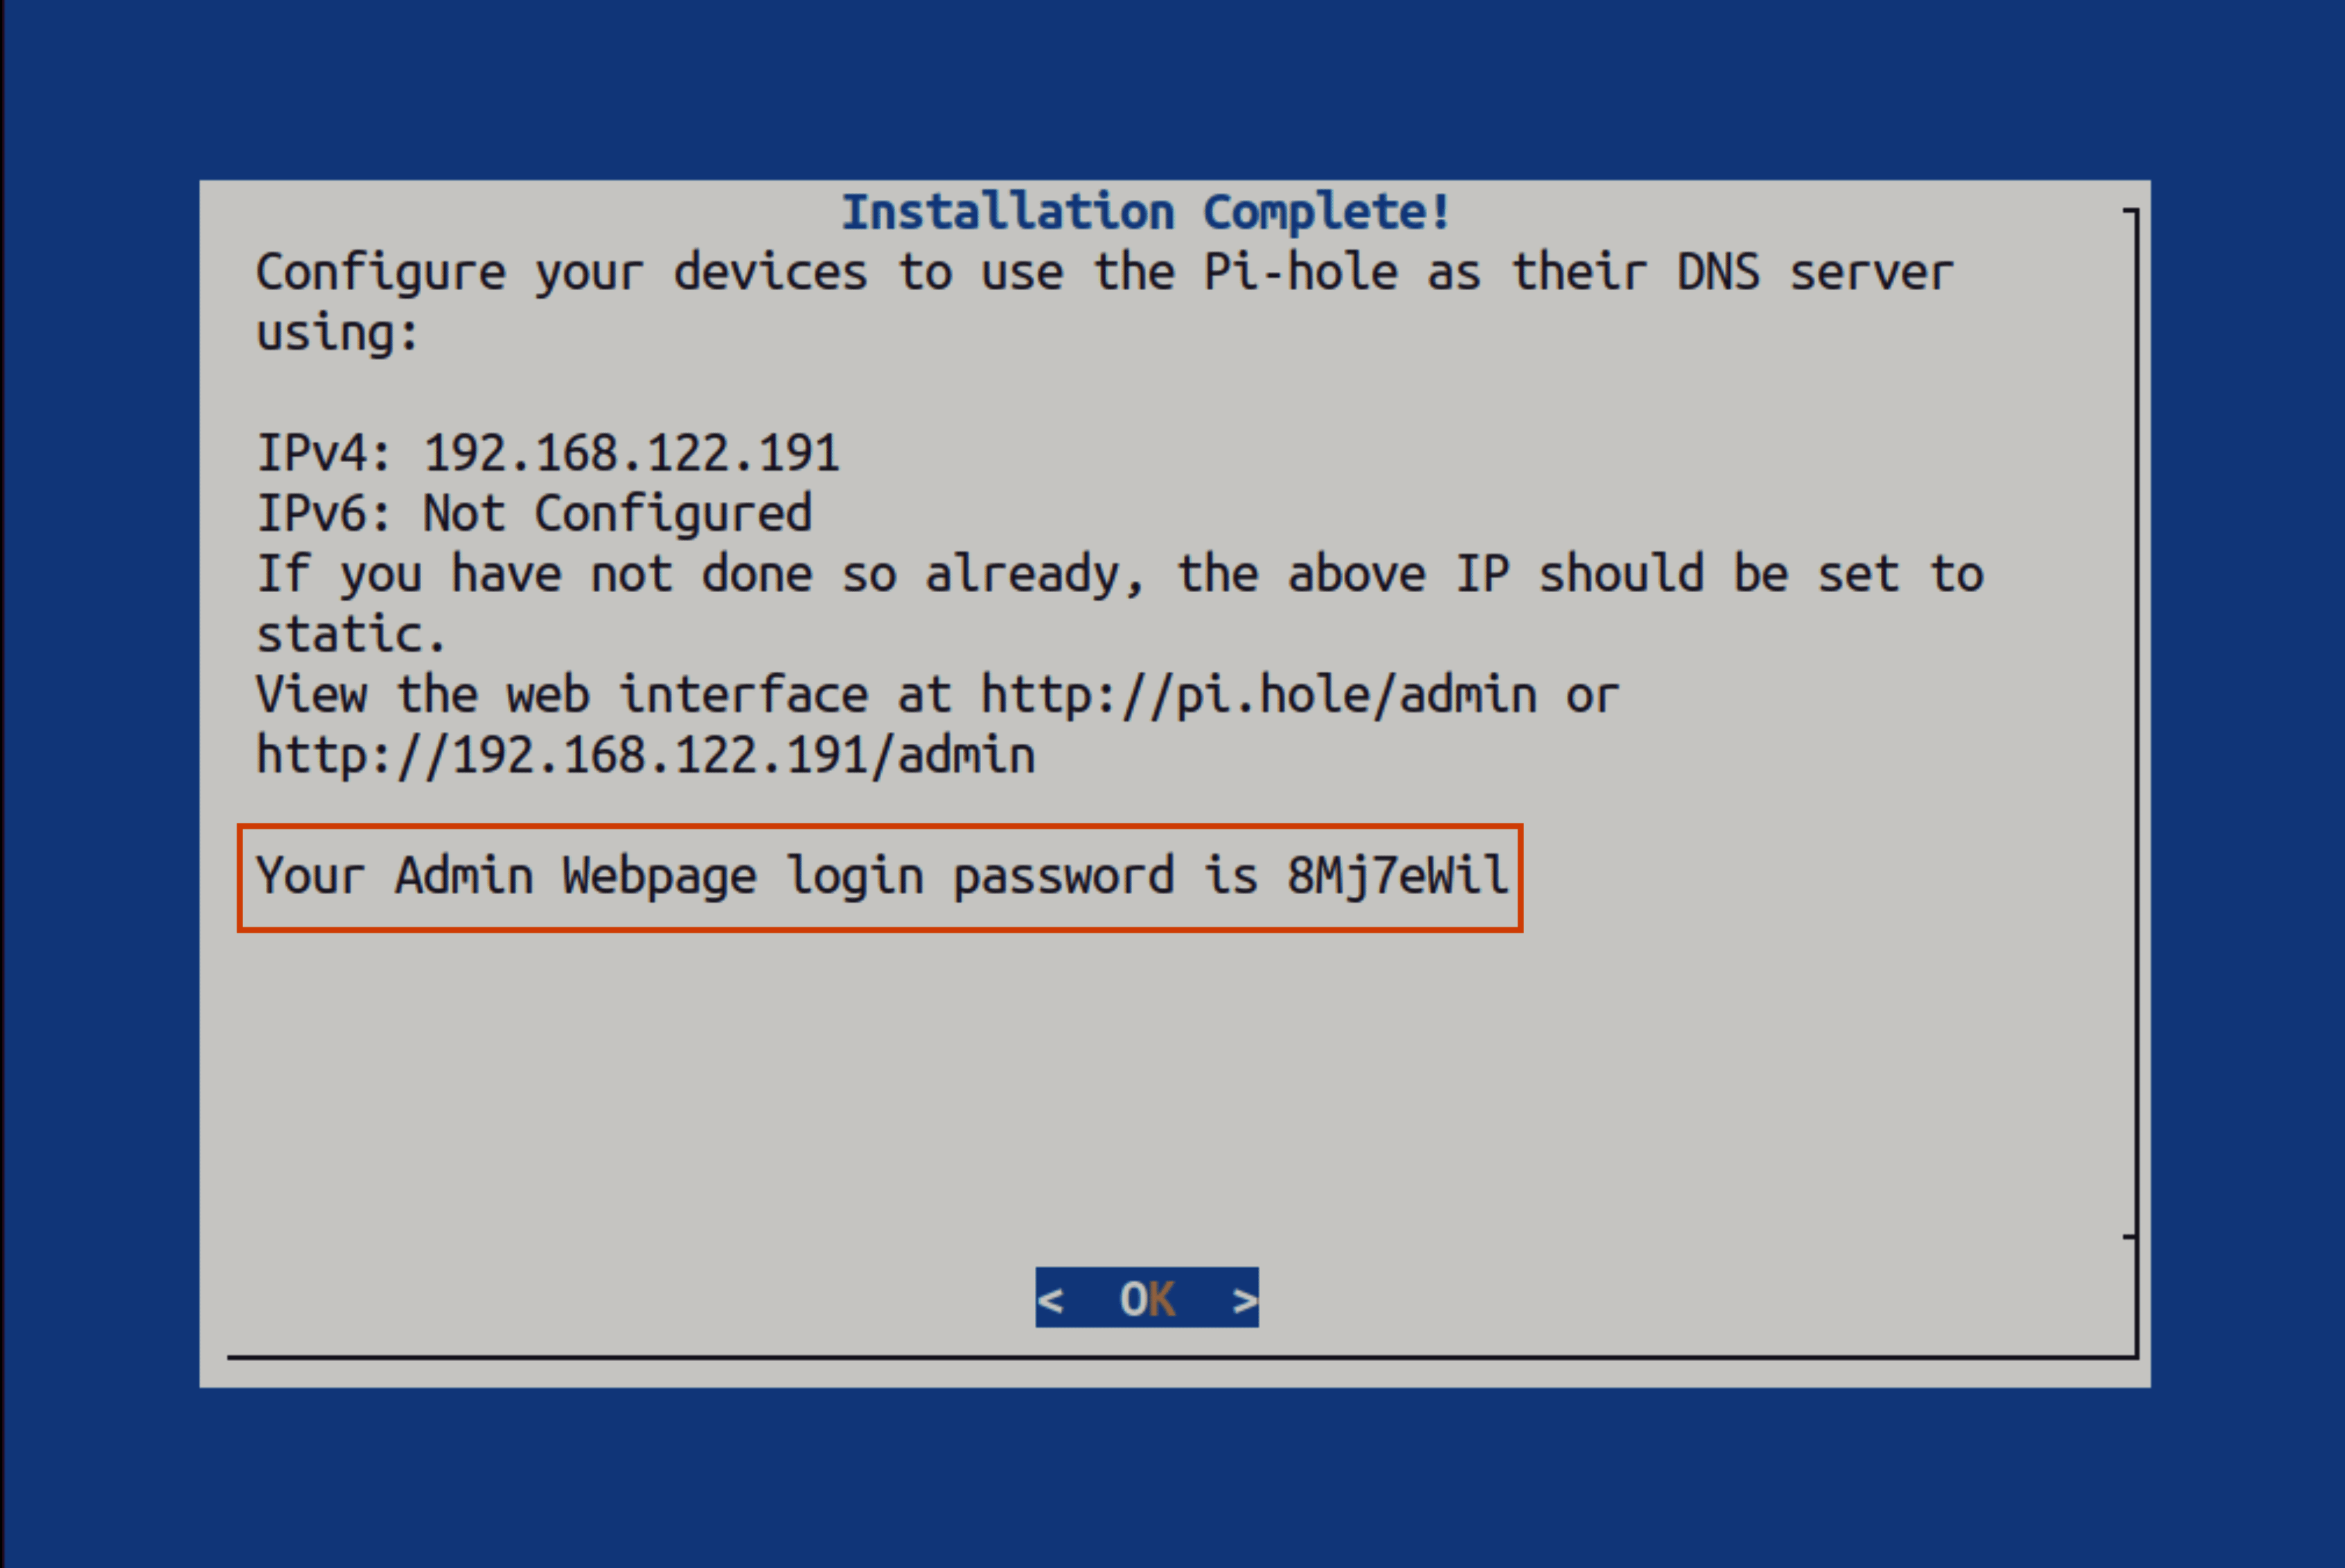
Note the admin password at the end of setup
-
At the end, you will see something like this:
-
At this point in the setup you have the option of using pi-hole at the device level or at the network level. In my case, I decided to use it at the device level, so let’s continue with the instructions.
-
Now that we have installed pi-hole, we need to configure our devices. In my case I will use my iPhone device.
First we go to settings
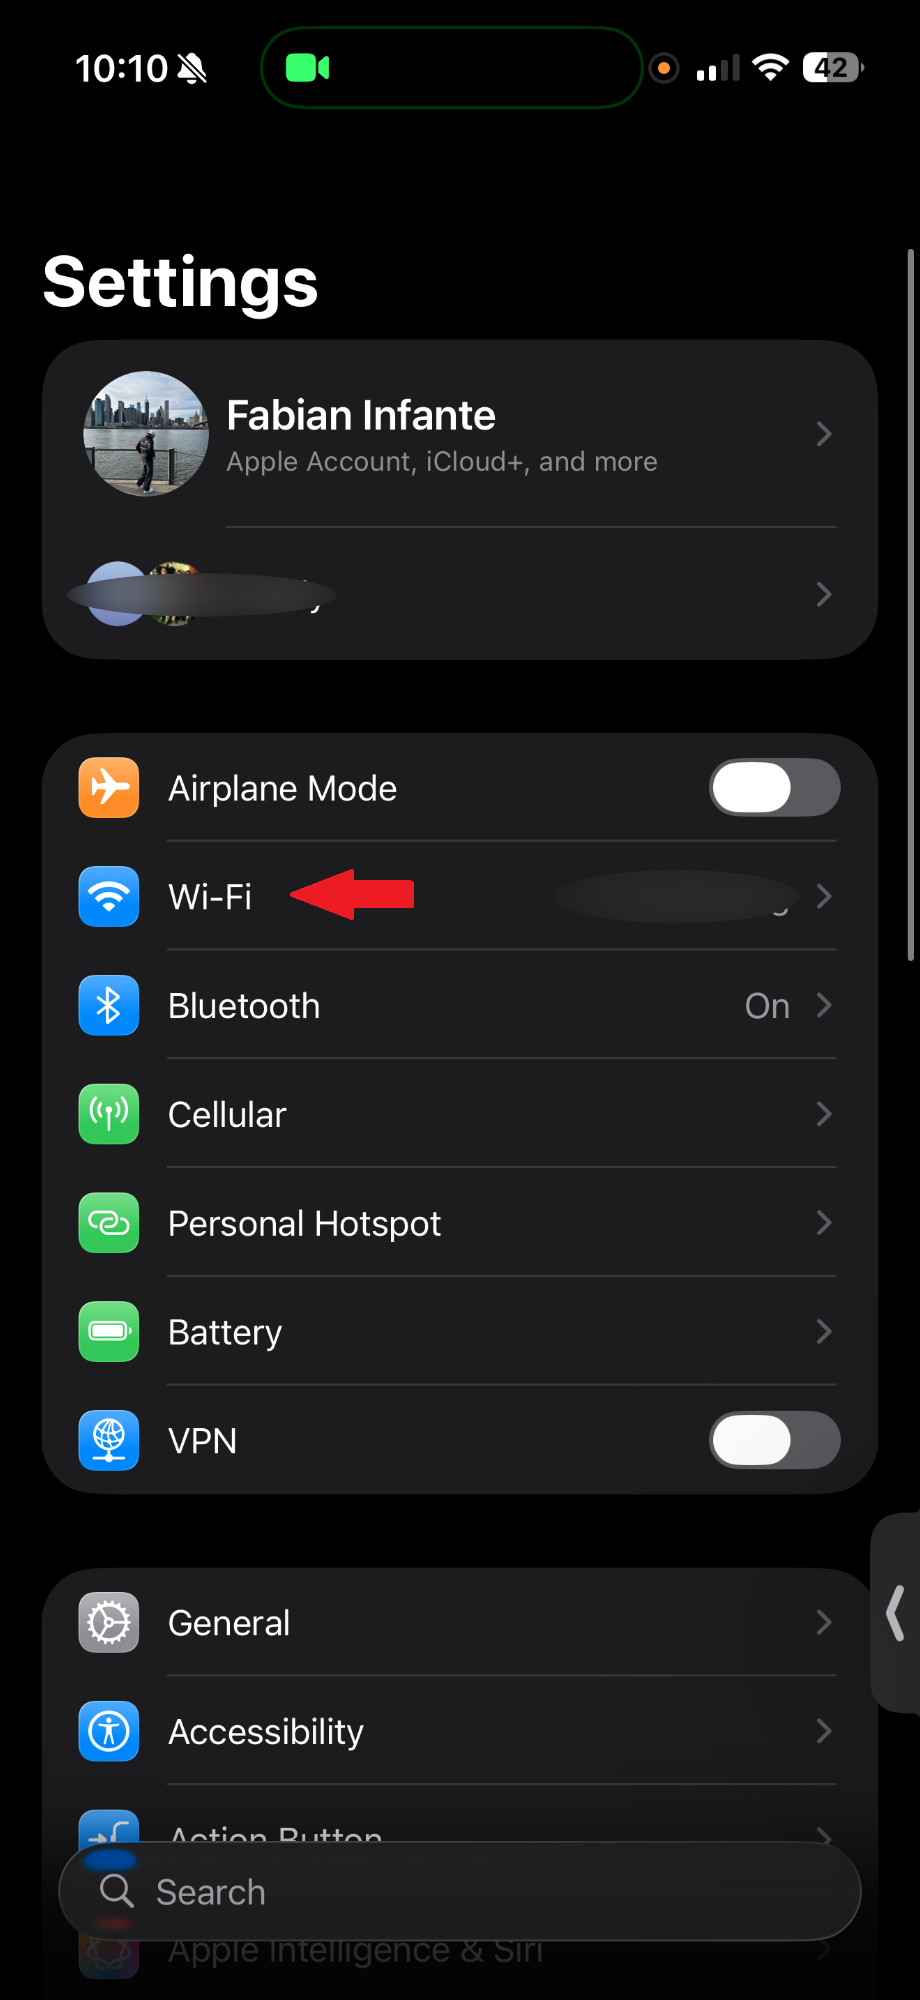
Now we click on the information icon of the Wi-Fi in which you configured your pi-hole.
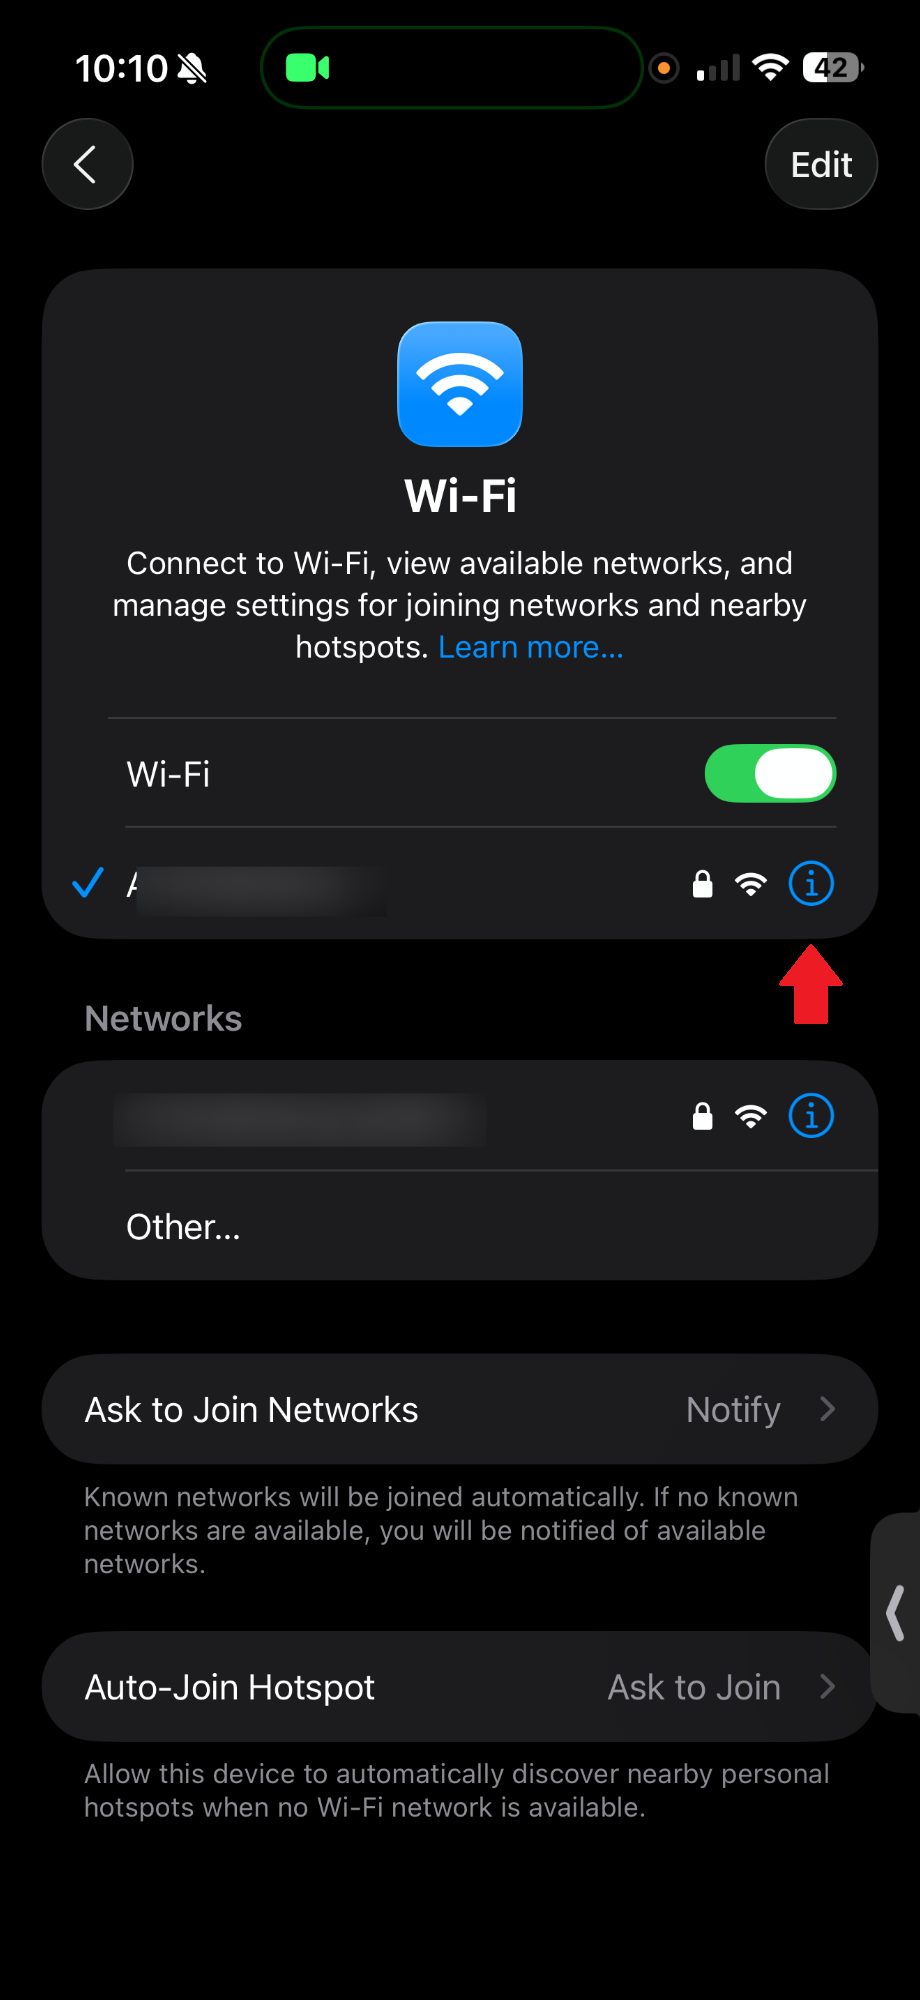
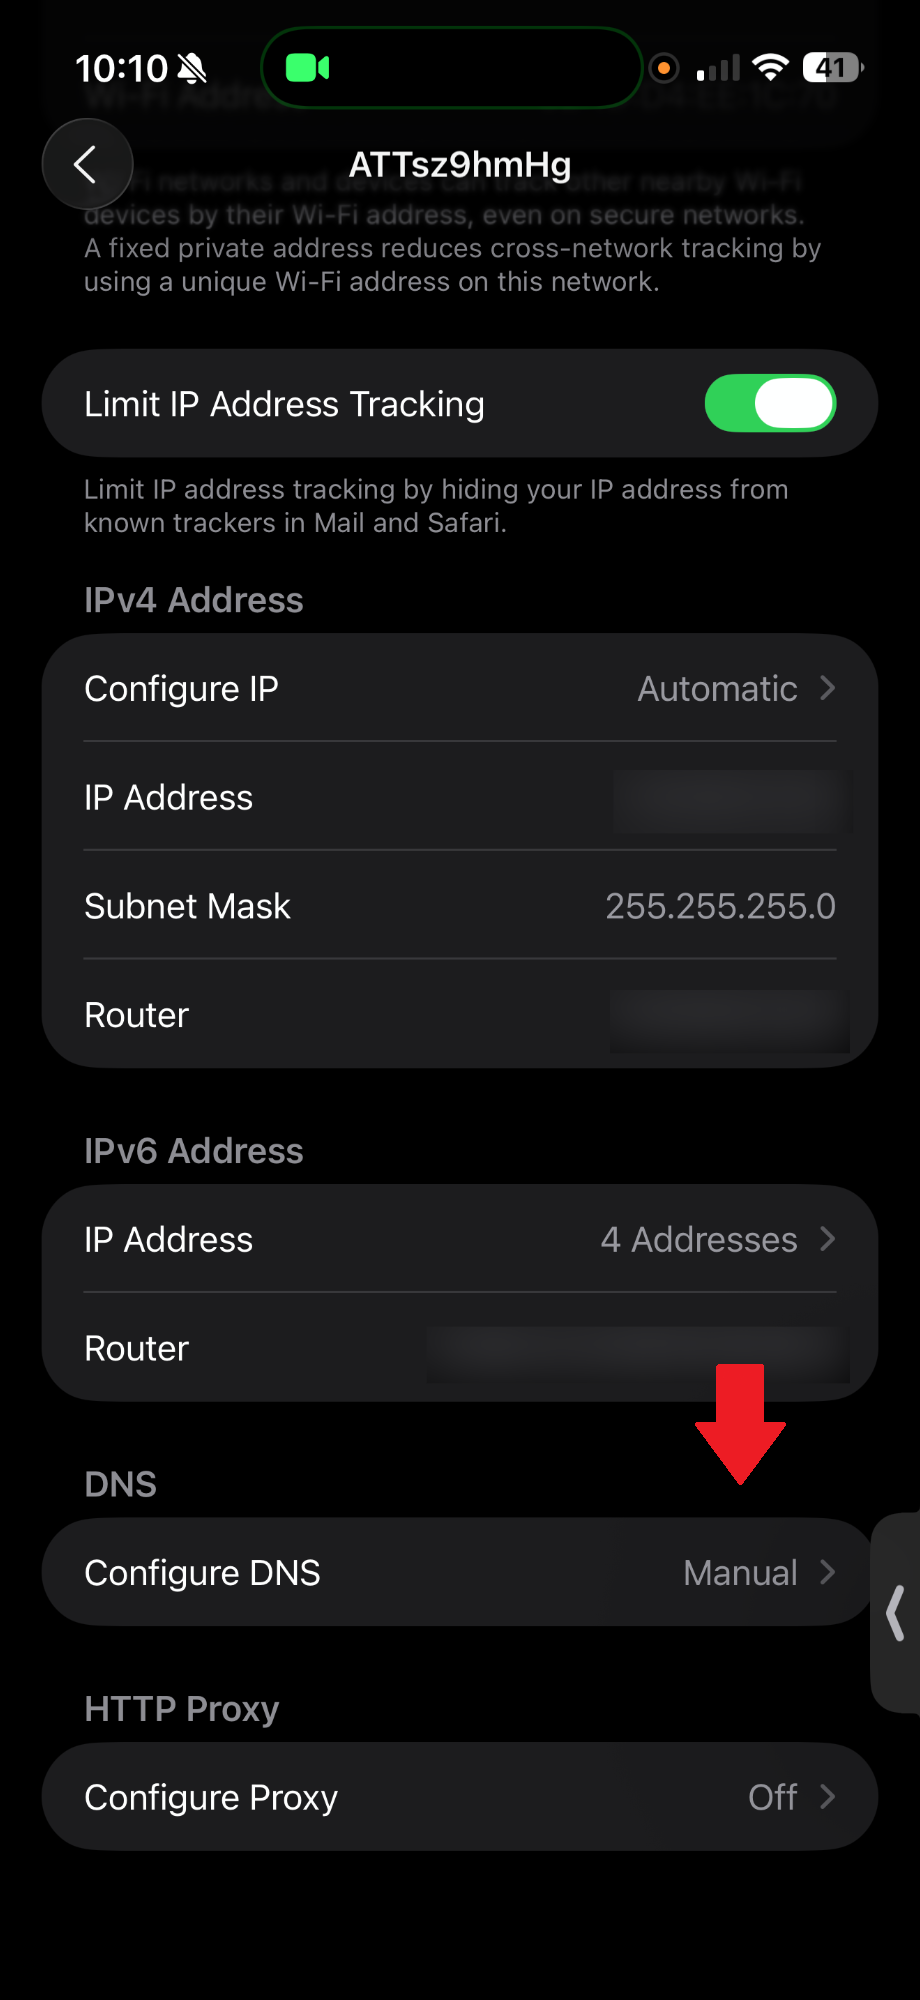
Then we click on “Configure DNS”
And lastly we click on “Add Server” and we add our Raspberry Pi’s IP address.
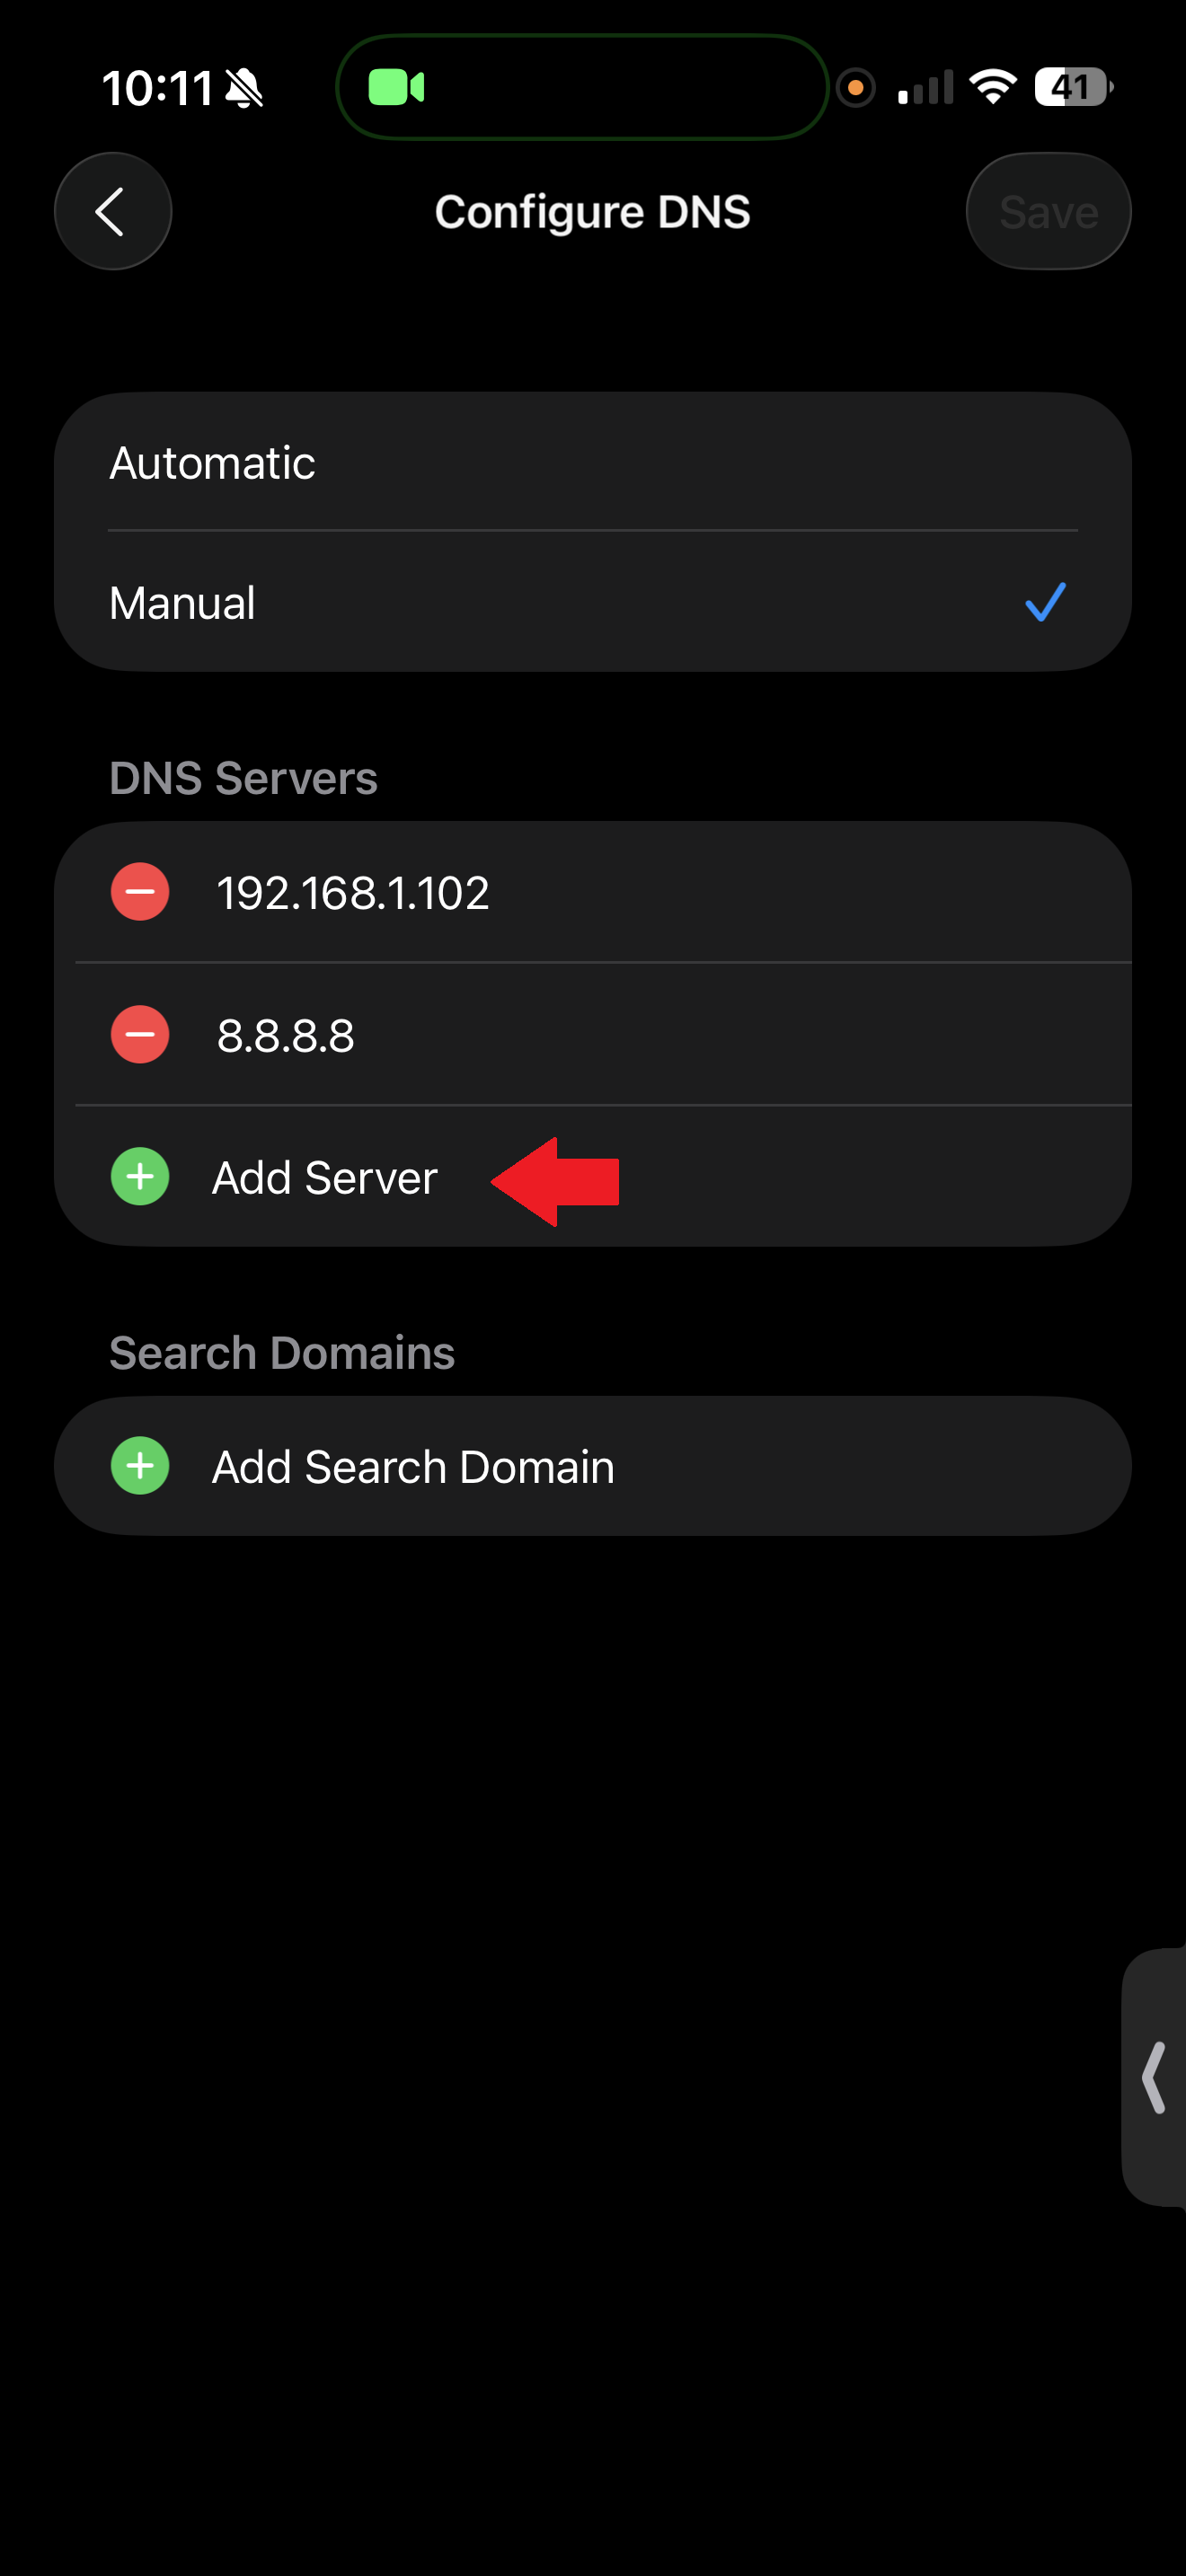
Once this is done. We should be all set! We have finally configured our own pi-hole!
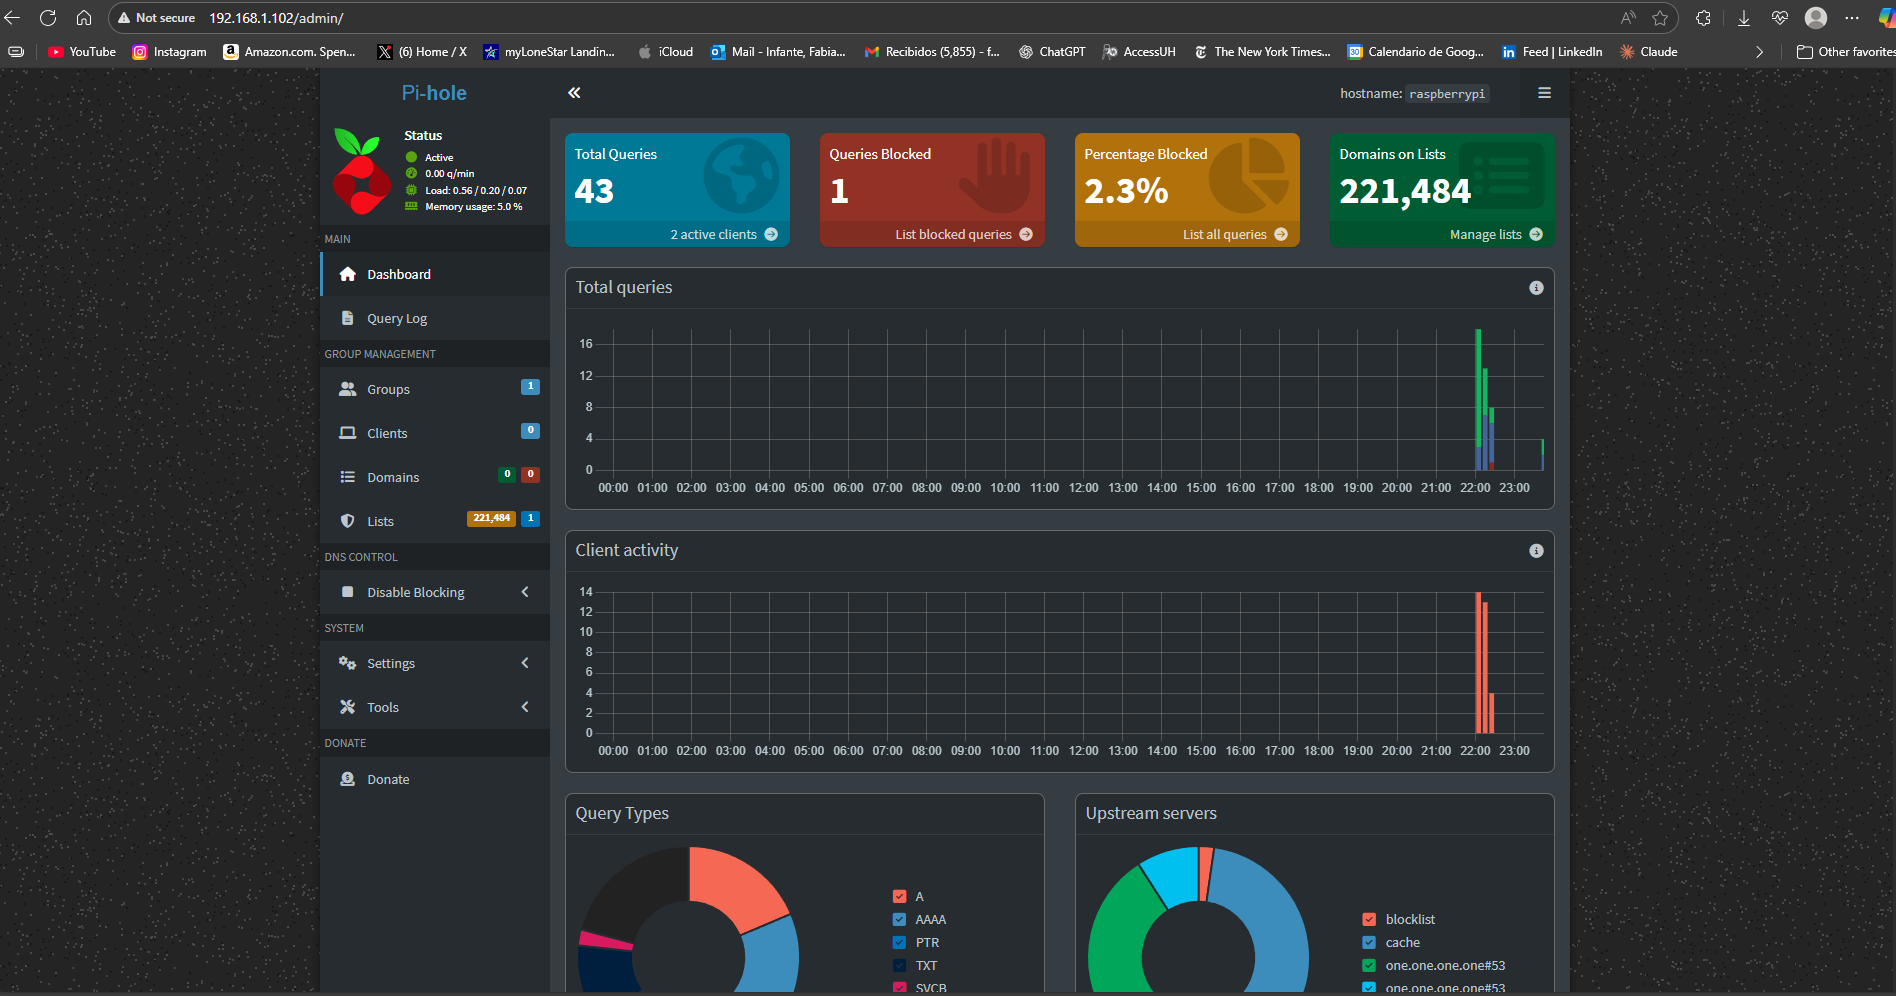
If you want to access your admin dashboard and take a look at how pi-hole is protecting you. You can type http://<raspberry-pi-ip-address>/admin on your browser and this will take you the dashboard where you can login using the credentials you set up when installing pi-hole in the terminal.
It will look something like this: